
What this guide will help you do
Follow the steps below to complete the task confidently and check that everything is working as expected.
Use the final dimensions including bleed.
Review fold, trim and safe areas.
Link artwork to connected-store products.
Before you start
These quick checks will help you avoid the most common setup problems.
Export the complete front and back card spread.
Background artwork should extend beyond the trim edge.
Important content should not sit close to the edge or fold.
Use the same SKU as your connected store listing.
Artwork sizes and file settings
Prepare your artwork at the final upload size shown below.
Upload size: 306 × 156mm
3mm bleed · 300 DPI
Upload size: 216 × 154mm
3mm bleed · 300 DPI
Upload size: 303 × 216mm
3mm bleed · 300 DPI
300 DPI.
High-quality JPG or PNG.
3mm around the outer edges.
Design in CMYK and export using the recommended Connect colour settings.
Upload your artwork
Open the Artwork page
Choose Artwork from the main menu, then click Add Artwork.
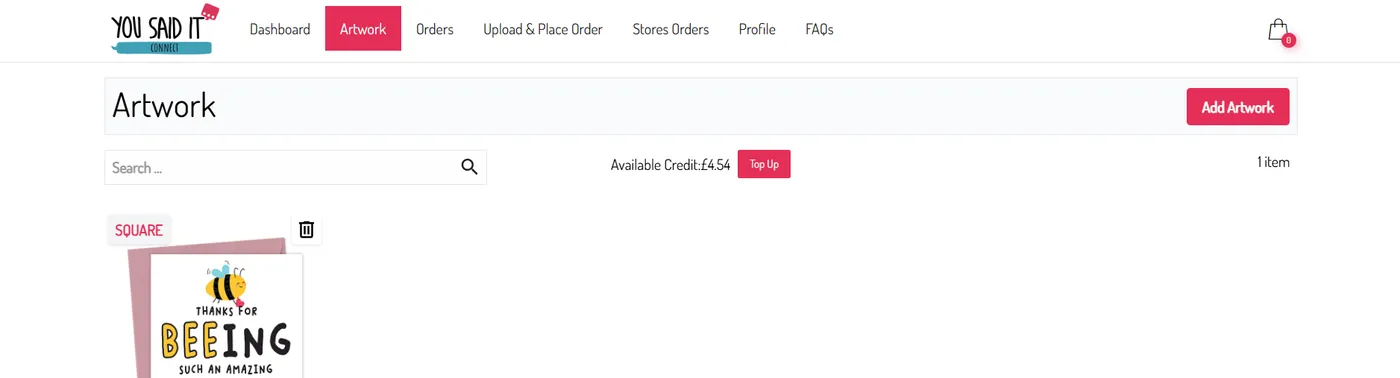
Choose the card size and upload your file
Select Square, A5 or A6, then drag your print-ready JPG or PNG into the upload area.
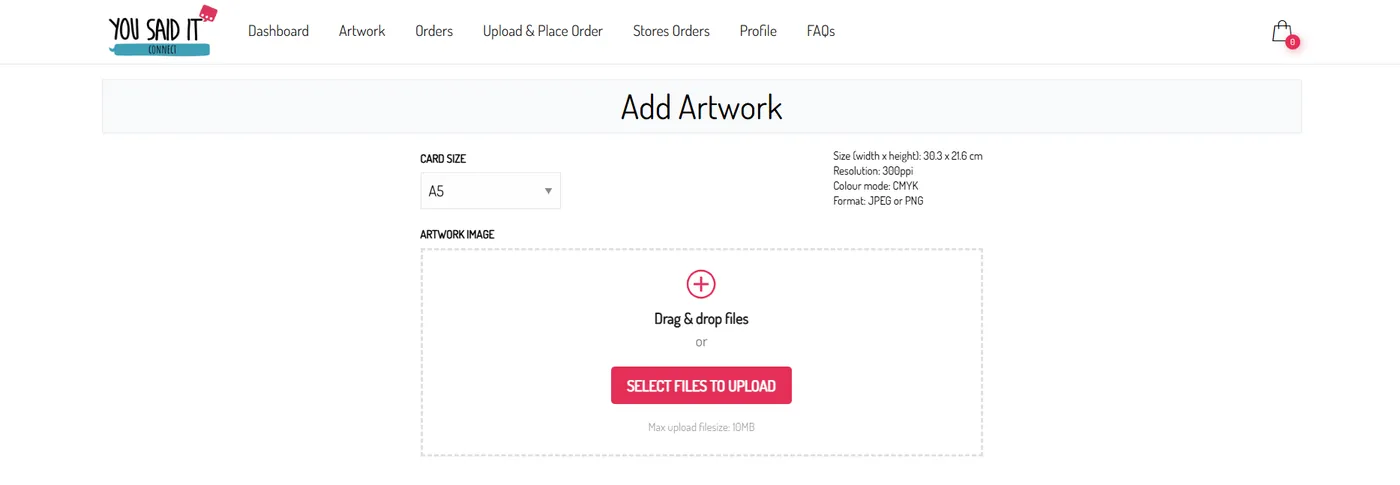
Your file must already include the 3mm bleed.
Review the preview
Check the fold line and bleed area. Keep text and important details safely away from the trim edge.
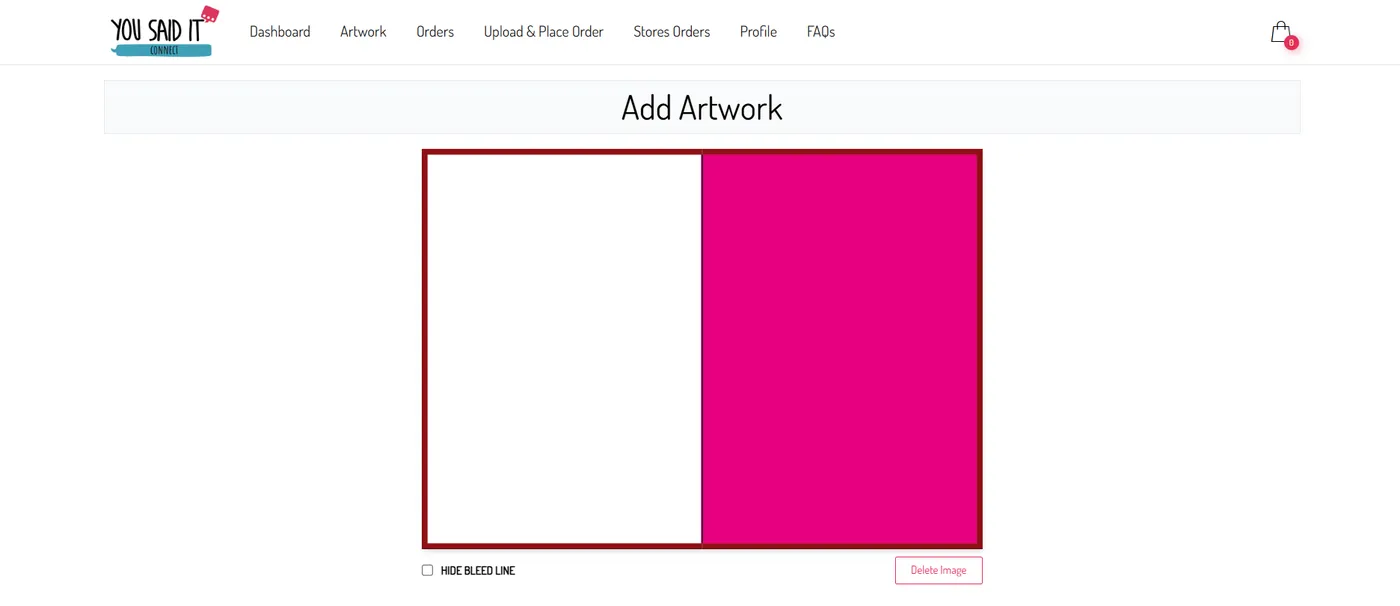
Only background colours and images should extend fully through the bleed.
Add a clear title and SKU
Enter a title that will make the design easy to find. Add the SKU used in your Shopify, WooCommerce or eBay listing.
Matching SKUs let Connect select the artwork automatically when store orders are imported.
Upload a preview image
Add a smaller preview image so the artwork is easy to recognise in your dashboard. It does not need to be print resolution.
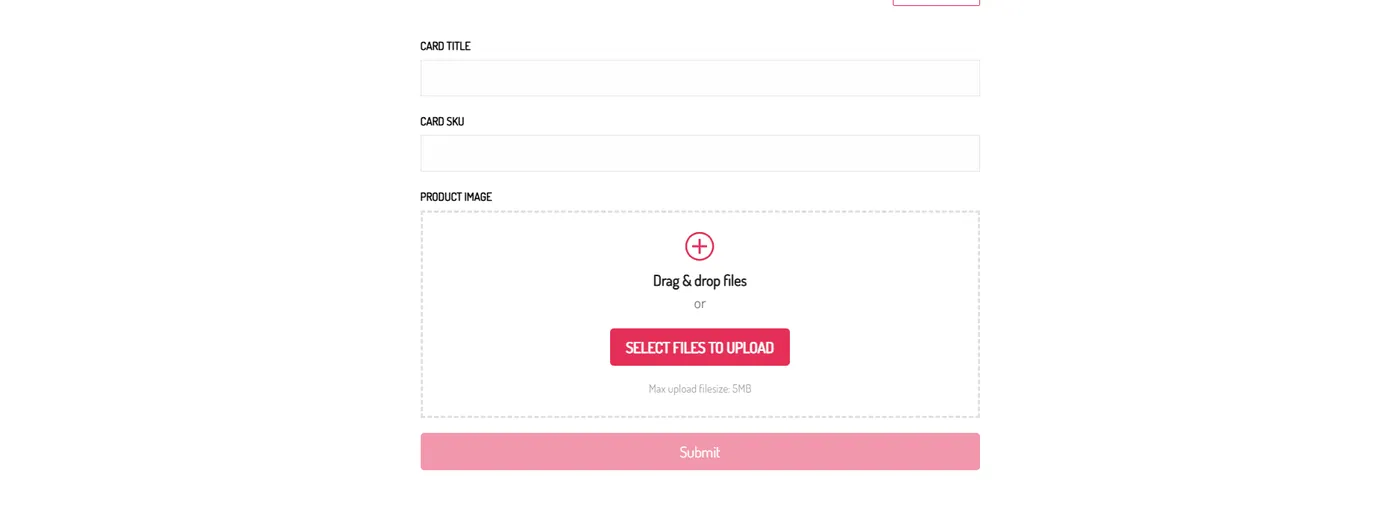
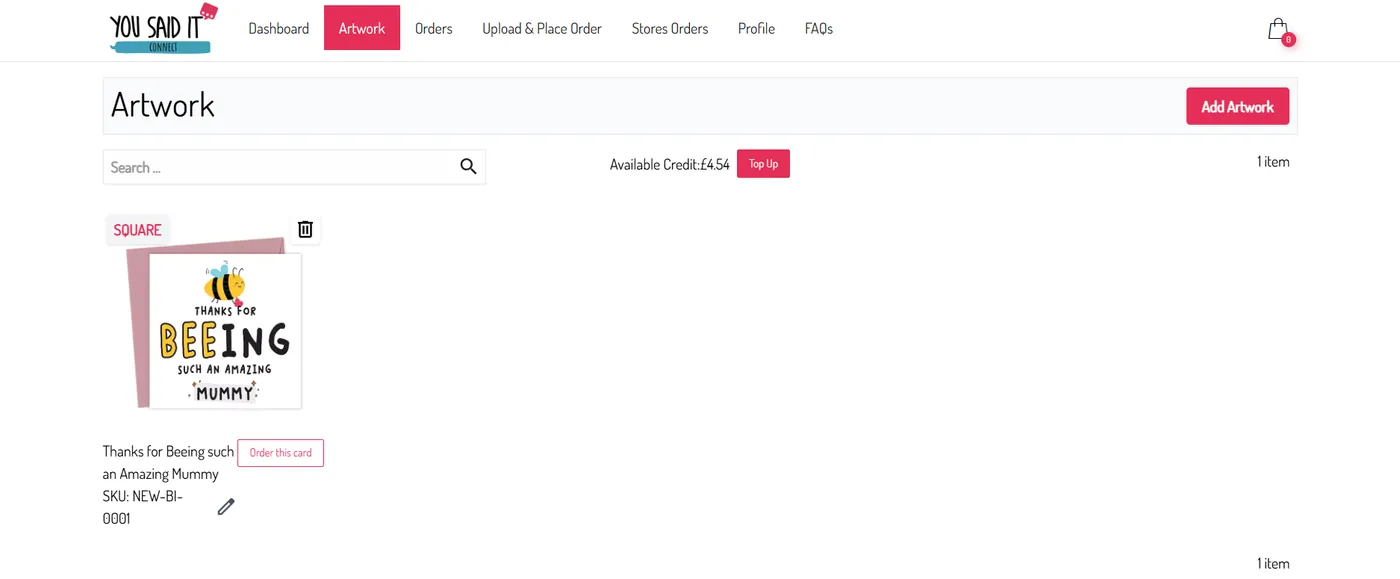
Submit and check the Artwork page
Click Submit. Your artwork will appear on the Artwork page ready to order.
Helpful tips
Small trimming movement can make borders look uneven.
Consistent names make large artwork libraries easier to manage.
Low-resolution artwork may look acceptable on screen but print poorly.
Make sure each side is positioned on the correct half of the file.
You’re ready
Before moving on, check that each of these is complete.